How to Use Facebook Pixel to Create and Re-Target Audience
Today, most online businesses rely on Facebook advertising to generate sales and ROI. According to the latest stats, Facebook reached up to 2 billion monthly visitors, which for marketers is great news.
The biggest benefit of advertising with Facebook is the opportunity you get to advertise on Instagram and Messenger as well.
But when it comes to building the right campaign designed to outperform what your competitors are doing, it’s important for you to track your website visitors.
Fortunately, with Facebook Pixel, you can not only successfully track your visitors, but also follow the important actions they complete on your website.
There are steps you need to take first to most effectively use Facebook Pixel. Here’s your introduction to three important things you can do with this tool to make it work for you.
Facebook Pixel: What it is & how does it work?
![]()
The Facebook Pixel is an analytics tool that allows you to measure the effectiveness of your advertising by understanding the actions people take on your website.
A few important things you can do with Facebook Pixel are:
- Display your ads to the right people
- Build custom audiences
- Build custom conversions
- Run dynamic ads
To measure your ads’ performance and the visitor actions on your website, you’ll need to add the pixel code on your website.
The pixel code is made up of two types.
1). Facebook pixel base code
This is the main code that goes on all the pages of your website. When added to your website, this code sends pageview data to your ads manager.
The base code is a JavaScript snippet containing your unique pixel ID.
This is how a base code looks:
!function(f,b,e,v,n,t,s)
{if(f.fbq)return;n=f.fbq=function(){n.callMethod?
n.callMethod.apply(n,arguments):n.queue.push(arguments)};
if(!f._fbq)f._fbq=n;n.push=n;n.loaded=!0;n.version=’2.0′;
n.queue=[];t=b.createElement(e);t.async=!0;
t.src=v;s=b.getElementsByTagName(e)[0];
s.parentNode.insertBefore(t,s)}(window, document,’script’,
‘https://connect.facebook.net/en_US/fbevents.js’);
fbq(‘init’, ‘7649488753342564’);
fbq(‘track’, ‘PageView’);
You will need to copy this code and add it to the head section on all pages of your website(s).
2). Standard & Custom Event Codes
Event Codes represent any action that a user performs on your website. It can be a button click or a form submission. To get more information about visitor actions, you will need to add event code to the specific action.
Facebook offers 9 standard events that can be easily added to your website. The event codes will be added to specific pages or actions, but it will not be added on all pages.
For example, to track the number of people submitting information to the Contact Us form on your website, you’ll need to add the standard event to the Thank You page.
Below is the event code for a Lead form submission:
fbq(‘track’,’Lead’);
Note: Adding this code is often overlooked at, so do not forget to add this to your thank you pages.
How Can You Add Pixel Codes?
There are two ways of adding pixel code to your website.
- First is the manual method that involves pasting the pixel code directly into your website code. The important thing you want to be certain to do is to add the base code in the head section of your code. Paste it just before the closing tag. Follow the step by step instructions to add the facebook pixel code.
2. The second method is by using a tag management solution like Google Tag Manager. With Google Tag Manager, you will not have to edit your website code. It gives you the ability to add a code anywhere on your website.
You will have to set the condition for where and when to fire the pixel codes. For example, if you have an ecommerce store and want to track the product price when a visitor clicks the Add To Cart button, you can use tag manager to capture dynamic values.
Follow the step by step guide to implementing facebook conversion tracking via Google Tag Manager.
How to view pixel data in Ads Manager
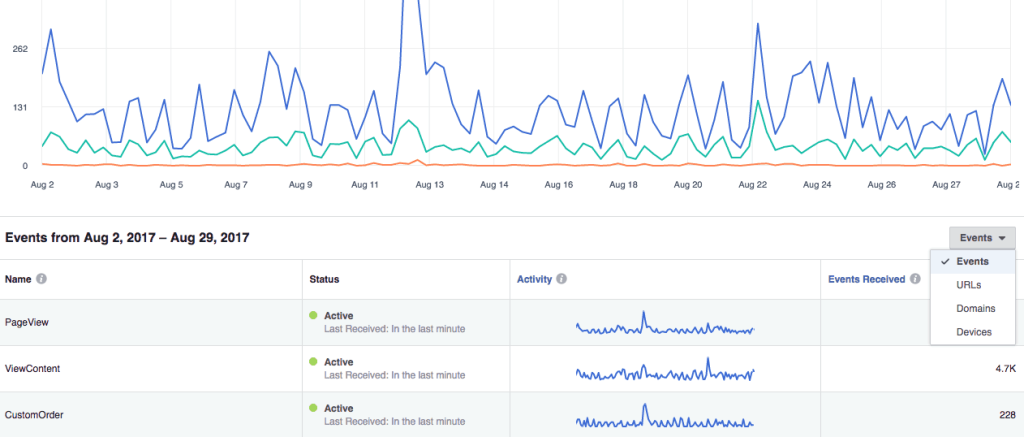
Once you add the pixel code on your website, you can then see data in ads manager. To view that data, open your ads manager and go to pixels. The pixels section displays the status of your pixel and the events that are active.
With pixels, you can see the following type of data related to your website visitors.
1. The device that is used to view your website
2. The domain they visited
3. URLs of the pages they visited
4. The events they perform
The important thing to notice in the above image is the drop-down menu. You can click to see the URLs that are most visited, and the domain and the devices that were used to visit your website.
What can you do with pixel data?
![]()
The data that pixel collects from your website is very important for your business decisions and especially for ad campaigns. There are at least three major tasks you can do with pixel data.
- Building custom audience
- Building custom conversion
- Product dynamic remarketing
Once you add the pixel events, you can then see the custom audience and custom conversion options.
1). Build Custom Audience
A custom audience is one that you create based on certain actions people take on your website. You can create an audience for people who completed a form submission event or add to cart event.
Follow the steps below to create a custom audience.
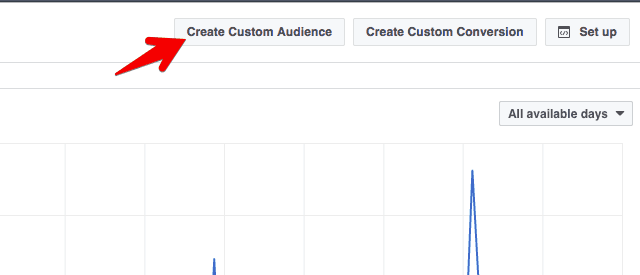
1. Click on the create custom audience button.
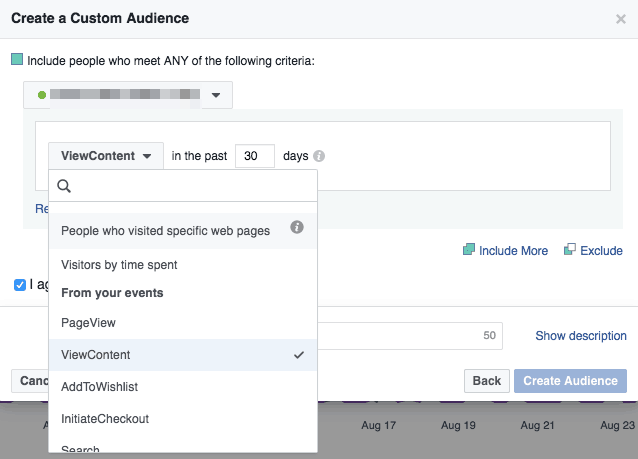
2. Select the type of audience you want to create and enter the number of days you want people to be included in that audience list.
Note: you can create an audience based on your standard or custom events. For example, you can create an audience for visitors who have completed the InitiateCheckout event.
1. Click on the Include More to add another rule that will work on OR condition. Click the exclude link if you want to exclude people who meet a certain condition.
2. Enter your audience name and click Create Audience.
Once you create the custom audience, Facebook will work to match it with users on the social media site and will notify you when they’re done.
2). Create Custom Conversion
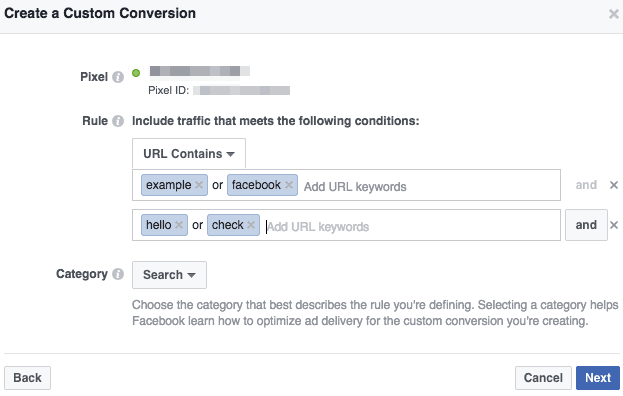
If you haven’t added standard events to your website, you can create custom conversions based on URL rules. To create a custom conversion based on URL rule, follow the steps below:
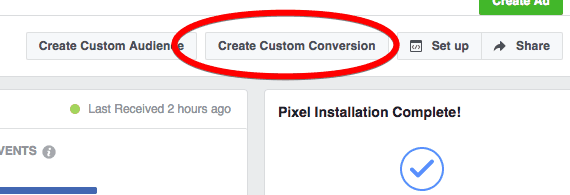
1). Click on the create custom conversion button within the pixel window
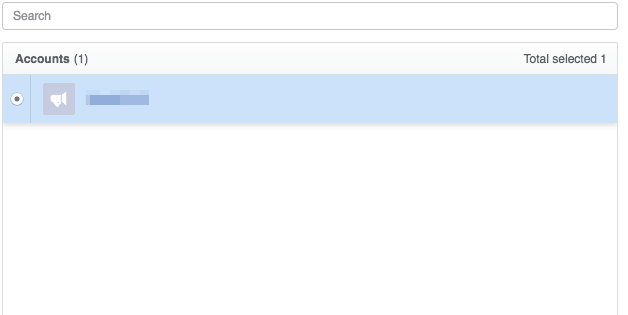
2). Select your ad account.
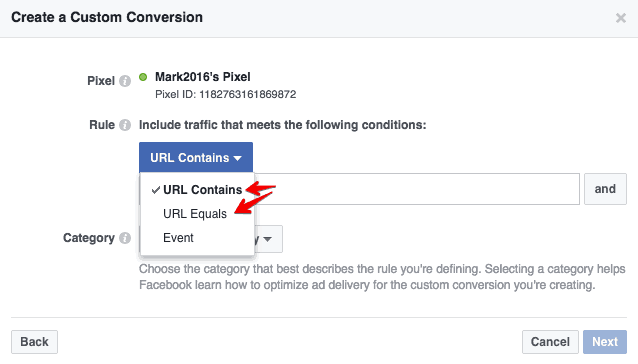
3). Select the rule from the drop-down.
Note: if you haven’t added any standard events on your site, you won’t be able to create any event-based rule, although you can still see a pageview event which is similar to URL.
4). Enter the keywords for the URL.
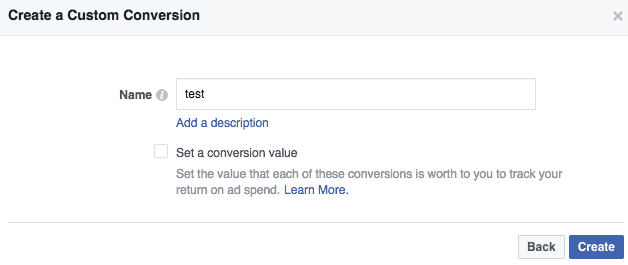
5). Click next and enter your audience name.
This article is more focused towards the use of standard events, so let’s see how we can use standard events to create a custom audience.
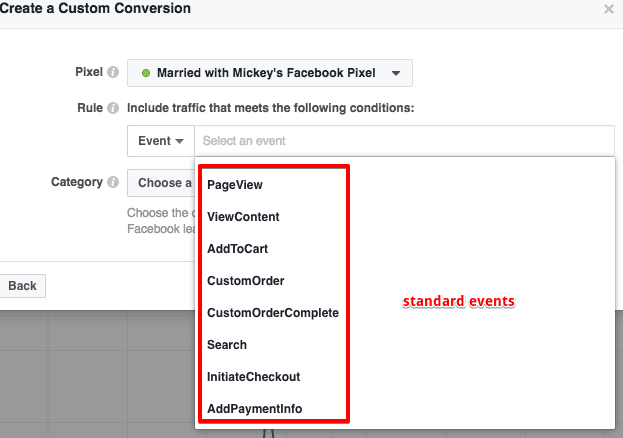
To create custom conversion, click event as a rule.
If you have added the event pixels on your site, you will see the list of events.
Let’s create a conversion for ViewContent event.
Select ViewContent from the drop-down list.
Next, enter the parameter name. (Note: if you don’t know about perimeters see ViewContent example code below.)
fbq(‘track’,’ViewContent’. {
content_name: ‘Nike shoes’,
content_category: ‘ladies wear’,
content_ids: [‘1234’],
content_type: ‘product’,
Value: 300,
Currency: ‘USD’
});
In the above code, content name, content_category, content_ids, content_type, value and currency are parameters that pass event details.
Select a parameter from the drop-down.
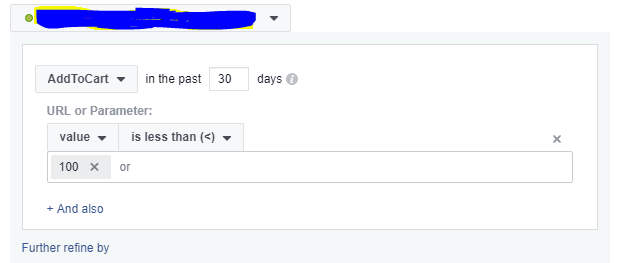
Let’s create an audience for people who have clicked on Add To Cart button that has a value greater than 100.
Click on the Next button, enter audience name and hit save.
Once you do this, you can create a specific ad for this audience and get them back so they will begin purchasing from your store.
3). Dynamic Product Remarketing
The third very important thing you can do with Facebook Pixel is dynamic product remarketing. This means you can display ads to people who are interested in your products or visited your site before but didn’t purchase.
To be eligible for product dynamic remarketing, it’s important that you add event pixel codes on your site. Product ID and currency parameters must also be added.
To know more about dynamic remarketing click here.
Bonus Tip: Create Funnel for Standard Events
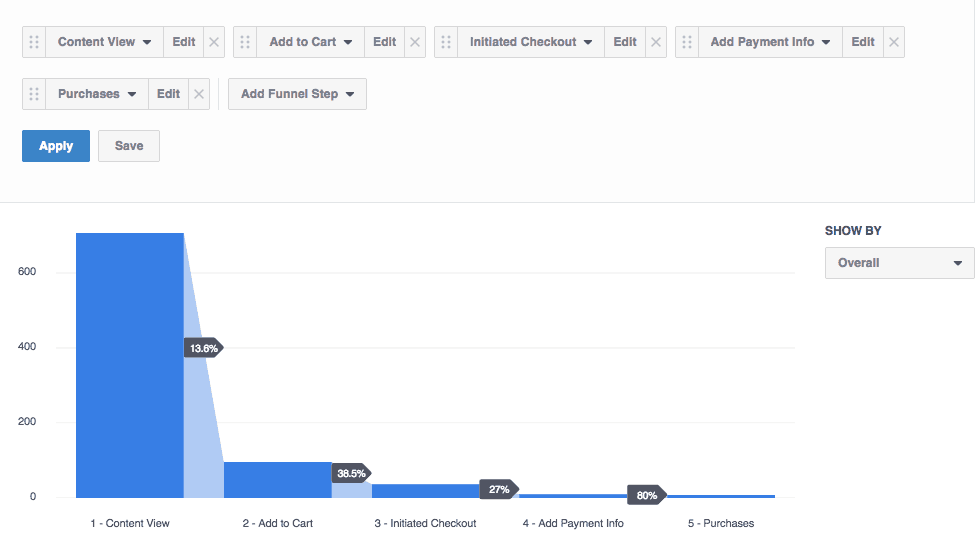
Facebook analytics provides a wide range of insights related to your website visitors. One of the notable features is being able to create the funnel. Creating a purchase funnel for an ecommerce store can help you understand at what point in the search that most of your visitors drop-off.
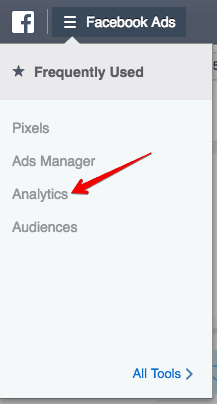
To create a funnel, open analytics from the top left drop-down.
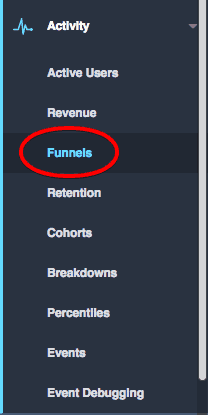
Inside analytics, select your analytics entity and click funnels from the left menu.
Click on d and add funnel steps.
For an ecommerce site, a purchase funnel can be ViewContent >> AddToCart >> InitiateCheckout >> AddPaymentInfo >> Purchase
Select the events in the above manner and click apply.
Now you can see how many people view your products and how many of them go through the checkout steps to complete a purchase.
“The Facebook pixel provides crucial information regarding account performance – such as measuring cross-device conversions – as well activating opportunities to target various audiences on Facebook. Without the Facebook pixel placed on your site, you cannot create website custom audiences based on website activity. These audiences allow you to establish lookalike audiences, which are the basis of most successful Facebook prospecting efforts, and to access other features such as dynamic retargeting.” –Danielle Oria, MetricTheory
Conclusion
Now it’s your turn to use Facebook Pixel. How you use it can improve your ads performance and allow you to target more visitors.
If you have any questions, don’t forget to buzz the comments section below. And check out Facebook Conversion tracking Google Tag Manager.


